CIC QMI8658 Breakout - Six-Axis (Gyro + Accelerometer) IMU Sensor Breakout
Overview
The QMI8658C is a complete 6D MEMS inertial measurement unit (IMU) with 9-axis sensor fusion and specified system level orientation accuracy. When using the QMI8658C in combination with the supplied XKF3 9D-sensor fusion, the system features an accurate ±3° pitch and roll orientation, and a ±5°yaw/heading typical specification.
The QMI8658C incorporates a 3-axis gyroscope and a 3-axis accelerometer. It provides a UI interface (supporting I³C, I²C and 3-wire or 4-wire SPI) .
Features
- Low 15 mdps/√Hz gyroscope noise, low-latency, and wide bandwidth for performance applications
- Low Noise 200µg/√Hz accelerometer
- Host (slave) interface supports MIPI™ I³C, I²C, and 3-wire or 4-wire SPI
- Complete inertial measurement unit (IMU) with sensor fusion library with specified orientation accuracy of ±3º pitch and roll, ±5º yaw/heading
- High-performance XKF3TM 6/9-axis sensor fusion with in-run calibration for correction of gyroscope bias drift over-temperature and lifetime
- 3-axis gyroscope and 3-axis accelerometer in a small 2.5 x 3.0 x 0.86 mm 14-pin LGA package
- Large 1536-byte FIFO can be used to buffer sensor data to lower system power dissipation
- Motion on demand technology for polling-based synchronization
- Large sensor dynamic ranges from ±16°/s to ±2048°/s for gyroscope and ±2 g to ±16 g for accelerometer
- Embedded temperature sensor
- Wide extended operating temperature range (-40°C to 85°C)
Specifications
- QMI8658C - Low power & Low nosie 3 Axis Accelerometer & 3 Axis Gyroscope
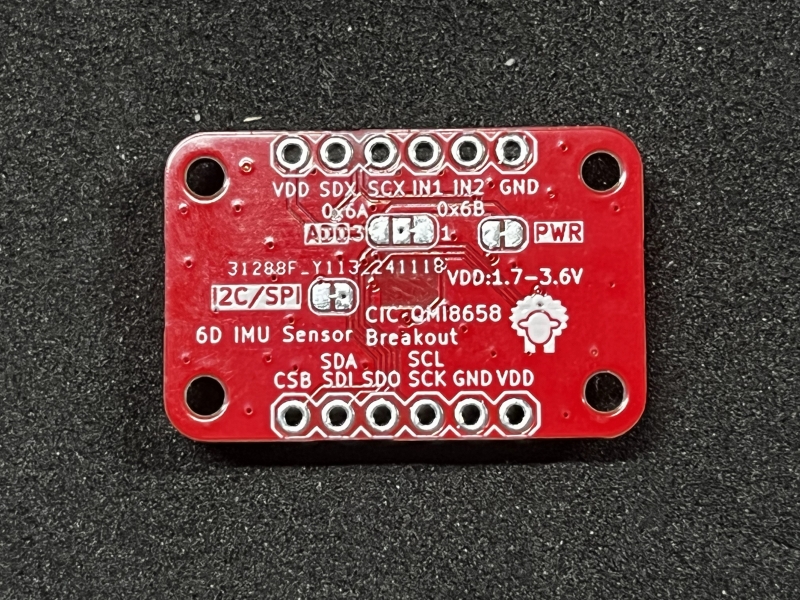
- Headers for I2C&SPI Interface, Default I2C interface
- Headers for Interrupt, Address and so on.
- Qwiic connector x 2, easy to debug & use
- Dimension: 28 x 18 x 5 mm
Hardware

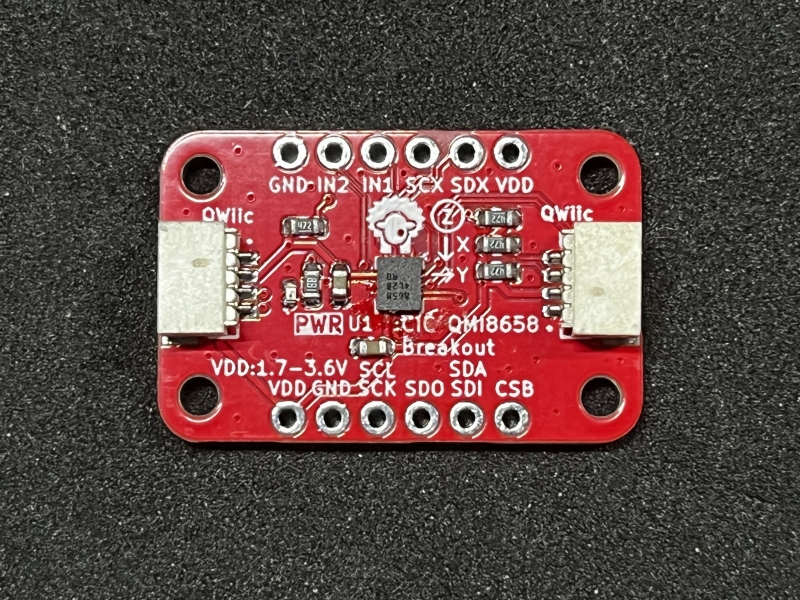
| Pin | Description | Note |
|---|---|---|
| VDD | Power supply voltage: 1.7-3.6V | |
| GND | Ground | |
| SCL/SCK | I2C interface Clock bus or SPI interface Clock bus | Had external pull-up resistor 4K7 |
| SDA/SDI | I2C interface Data bus or SPI Data in | Had external pull-up resistor 4K7 |
| SDO | SPI Data Out | |
| CSB | SPI Chip Select | |
| INT1 | Interrupt digital output 1 (totem pole or open-drain) Active low | |
| INT2 | Interrupt digital output 2 (totem pole or open-drain) Active low | |
| SDX | Aux I2C interface Data bus | |
| SCX | Aux I2C interface Clock bus |
Default I2C interface 7 bit device address: 0x6B
User Guide
It is the best choice to develop embedded drivers with embedded rust. Because the driver can be used with MCU like ESP32, also used with ARM64 Linux Application, for example raspberry pi directly.
You can download the qmi8658 rust driver with git, also add your rust project with cargo - cargo add qmi8658.
The examples as below use the first one.
https://github.com/xpulabs/qmi8658-rs
Examples
Simple Read QMI8658 Acc & Gypro Data
This example will simply read QMI8658 Accelerator & Gypro Sensor Data & Temperature
use linux_embedded_hal::I2cdev;
use qmi8658c::*;
use qmi8658c::Qmi8658;

fn main() {
    let dev = I2cdev::new("/dev/i2c-3").unwrap();
    let mut ic = Qmi8658::new(dev, 0x6b);

    let cfg = Config {
        mode: Mode::DUAL,
        acc_range: Acc_Range::RANGE_16G,
        acc_odr: Acc_ODR::ACC_ODR_6DOF_1880,
        gyro_range: Gyro_Range::RANGE_2048DPS,
        gyro_odr: Gyro_ODR::GYRO_ODR_940,
    };

    let ret = ic.start(&cfg).unwrap();
    // let ret = true;
    // ic.sw_reset().unwrap();
    std::thread::sleep(std::time::Duration::from_millis(1000));
    let chip_id = ic.id().unwrap();
    let chip_revision = ic.revision().unwrap();

    println!("chip id = {:#02x}, revision id = {:#02x}, start: {}", chip_id, chip_revision, ret);
    std::thread::sleep(std::time::Duration::from_millis(1000));

    let ret = ic.read_register(Register::CTRL1).unwrap();
    println!("ctrl1 = {:#02x}", ret);
    let ret = ic.read_register(Register::CTRL2).unwrap();
    println!("ctrl2 = {:#02x}", ret);
    let ret = ic.read_register(Register::CTRL3).unwrap();
    println!("ctrl3 = {:#02x}", ret);
    let ret = ic.read_register(Register::CTRL5).unwrap();
    println!("ctrl5 = {:#02x}", ret);
    let ret = ic.read_register(Register::CTRL7).unwrap();
    println!("ctrl7 = {:#02x}", ret);
    let ret = ic.read_register(Register::CTRL8).unwrap();
    println!("ctrl8 = {:#02x}", ret);
    let ret = ic.read_register(Register::CTRL9).unwrap();
    println!("ctrl9 = {:#02x}", ret);


    loop {
        ic.read_accl_data().unwrap();
        ic.read_temp_data().unwrap();
        ic.read_gyro_data().unwrap();
        println!("Accl X: {:.02}, {}", ic.accl_x, ic.accl_x_raw);
        println!("Accl Y: {:.02}, {}", ic.accl_y, ic.accl_y_raw);
        println!("Accl Z: {:.02}, {}", ic.accl_z, ic.accl_z_raw);
        println!("Gyro X: {:.02}, {}", ic.gyro_x, ic.gyro_x_raw);
        println!("Gyro Y: {:.02}, {}", ic.gyro_y, ic.gyro_y_raw);
        println!("Gyro Z: {:.02}, {}", ic.gyro_z, ic.gyro_z_raw);

        println!("Temperature: {:.02}, {}", ic.temp, ic.temp_raw);

        std::thread::sleep(std::time::Duration::from_millis(100));
    }
}
/dev/i2c-3is a i2c controller of rpi.- The QMI8658's I2C Device address is 0x6B. So we use
newfunction to create a instance.Qmi8658::new(i2c) startfunction will set up & initailize chipread_accl_datafunction will get the accelerator sensor dataread_temp_datafunction will get the gypro dataread_gyro_datafunction will get the temperature
Use the command as below to build and run the app.
cargo build --target aarch64-unknown-linux-gnu -- example simple
scp -r ./target/aarch64-unknown-linux-gnu/debug/example/simple rpi@192.168.6.77:
After login the RPI with SSH, we can execute the app directly.
sudo ./simple
The terminal will print the accelerator & gyro, temperature.
Buy it Now
Resources
Documents
Codes
3D Drawing
TBD
FAQ
TBD