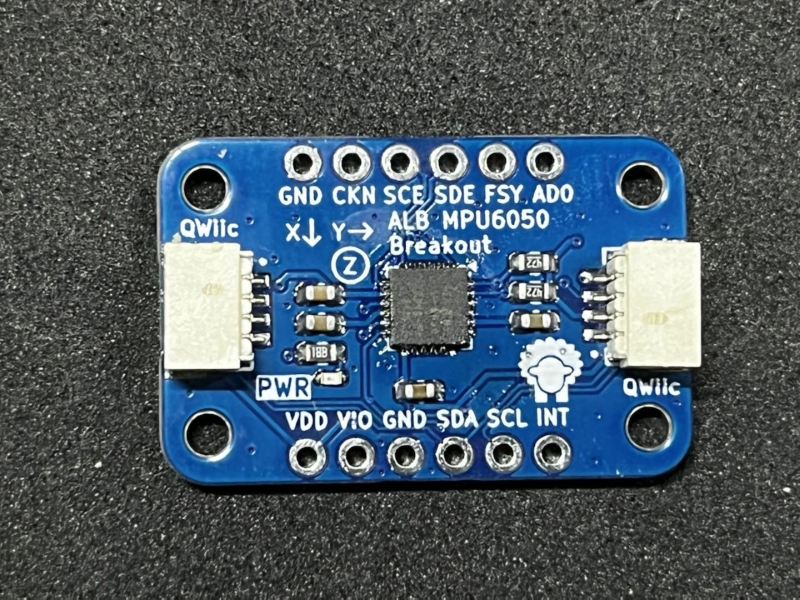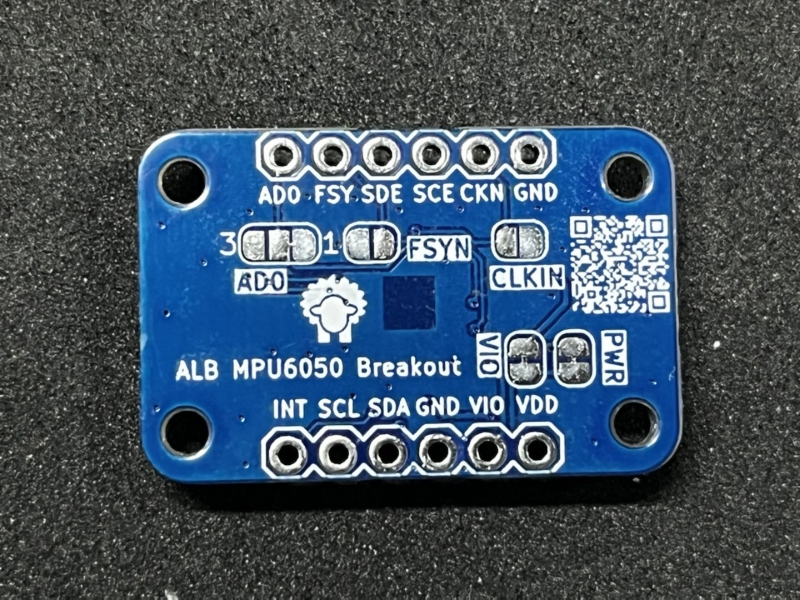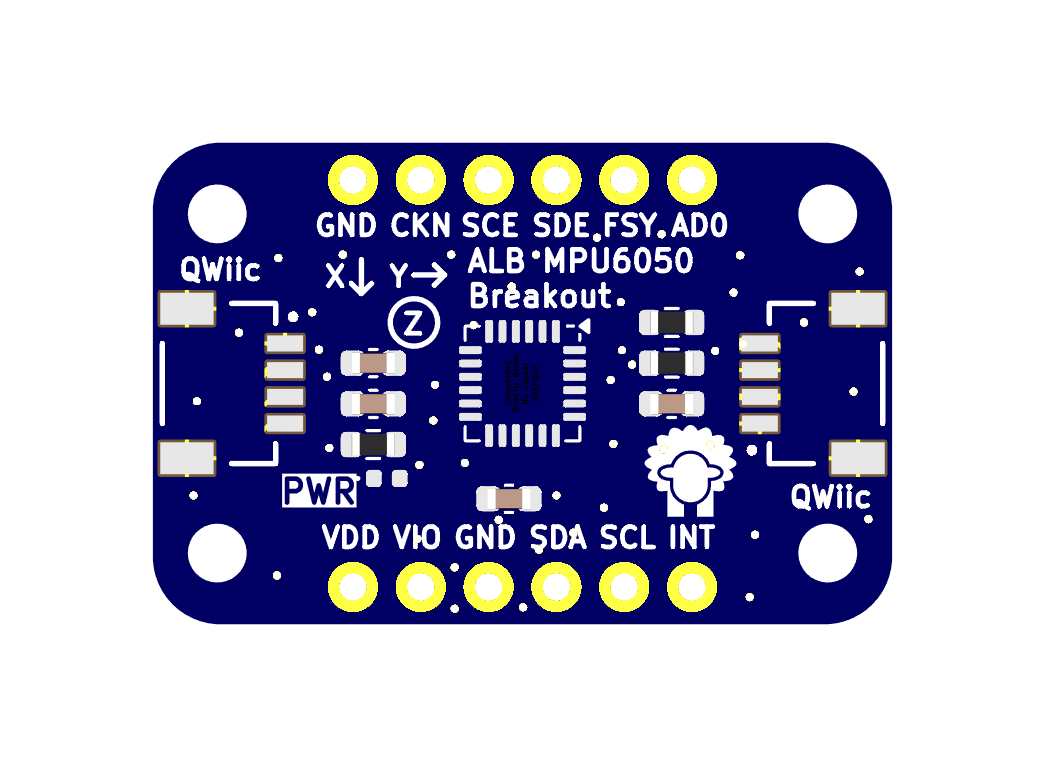
ALB MPU-6050 Breakout - Six-Axis (Gyro + Accelerometer) MEMS Sensor
Overview
The MPU-6050™ parts are the world’s first MotionTracking devices designed for the low power, low cost, and high-performance. The MPU-6050 devices combine a 3-axis gyroscope and a 3-axis accelerometer on the same silicon die, together with an onboard Digital Motion Processor™ (DMP™), which processes complex 6-axis MotionFusion algorithms. The device can access external magnetometers or other sensors through an auxiliary master I²C bus, allowing the devices to gather a full set of sensor data without intervention from the system processor.
For precision tracking of both fast and slow motions, the parts feature a user-programmable gyro full-scale range of ±250, ±500, ±1000, and ±2000 °/sec (dps), and a user-programmable accelerometer full-scale range of ±2g, ±4g, ±8g, and ±16g. Additional features include an embedded temperature sensor and an on-chip oscillator with ±1% variation over the operating temperature range.


Features
- Tri-Axis angular rate sensor (gyro) with a sensitivity up to 131 LSBs/dps and a full-scale range of ±250, ±500, ±1000, and ±2000dps
- Tri-Axis accelerometer with a programmable full scale range of ±2g, ±4g, ±8g and ±16g
- Digital-output temperature sensor
- VDD Supply voltage range of 2.375V–3.46V; VLOGIC (MPU-6050) at 1.8V±5% or VDD
- Accel low power mode operating currents: 10µA at 1Hz, 20µA at 5Hz, 70µA at 20Hz, 140µA at 40Hz
- 400kHz Fast Mode I²C interfaces
Specifications
- AW9523B - a 16 multi-function LED driver and GPIO controller
- Headers for I2C Interface
- Headers for FSYC, Address and so on.
- Qwiic connector x 2, easy to debug & use
- Dimension: 28 x 18 x 5 mm
Hardware

| Pin | Description | Note |
|---|---|---|
| VDD | Power supply voltage: 2.4-3.5V | |
| VIO | Digital I/O supply voltage: 1.8-VDD | |
| GND | Ground | |
| SDA | I2C interface Data bus | Had external pull-up resistor 4K7 |
| SCL | I2C interface Clock bus | Had external pull-up resistor 4K7 |
| INT | Interrupt digital output (totem pole or open-drain) Active low | |
| AD0 | I2C interface device address bit0 | Default 0 |
| FSYNC | Frame synchronization digital input. Connect to GND if not used | |
| SDE | Aux I2C interface Data bus | |
| SCE | Aux I2C interface Clock bus | |
| CLKIN | Optional external reference clock input. Connect to GND if unused. |
Default I2C interface 7 bit device address: 0x34
User Guide
It is the best choice to develop embedded drivers with embedded rust. Because the driver can be used with MCU like ESP32, also used with ARM64 Linux Application, for example raspberry pi directly.
You can download the mpu-6050 rust driver with git, also add your rust project with cargo - cargo add mpu6050.
The examples as below use the first one.
git clone https://github.com/juliangaal/mpu6050/
Examples
Simple Read MPU-6050 Acc & Gypro Data
This example will simply read mpu-6050 Accelerator & Gypro Sensor Data & Temperature
use mpu6050::*;
use linux_embedded_hal::{I2cdev, Delay};
use i2cdev::linux::LinuxI2CError;

fn main() -> Result<(), Mpu6050Error<LinuxI2CError>> {
    let i2c = I2cdev::new("/dev/i2c-3")
        .map_err(Mpu6050Error::I2c)?;

    let mut delay = Delay;
    let mut mpu = Mpu6050::new(i2c);

    mpu.init(&mut delay)?;

    loop {
        // get roll and pitch estimate
        let acc = mpu.get_acc_angles()?;
        println!("r/p: {:?}", acc);

        // get sensor temp
        let temp = mpu.get_temp()?;
        println!("temp: {:?}c", temp);

        // get gyro data, scaled with sensitivity
        let gyro = mpu.get_gyro()?;
        println!("gyro: {:?}", gyro);

        // get accelerometer data, scaled with sensitivity
        let acc = mpu.get_acc()?;
        println!("acc: {:?}", acc);
    }
}
/dev/i2c-3is a i2c controller of rpi.- The MPU-6050's I2C Device address is 0x34. So we use
newfunction to create a instance.Mpu6050::new(i2c) get_accfunction will get the accelerator sensor dataget_gyrofunction will get the gypro dataget_tempfunction will get the temperatureget_acc_anglesfunction will get roll and pitch estimate
Use the command as below to build and run the app.
cargo build --target aarch64-unknown-linux-gnu -- example simple
scp -r ./target/aarch64-unknown-linux-gnu/debug/example/simple rpi@192.168.6.77:
After login the RPI with SSH, we can execute the app directly.
sudo ./simple
The terminal will print the accelerator & gyro, temperature.
MPU-6050 Self-Test
This example will read MPU-6050 Register and check the value in the range of MPU-6050.
use mpu6050::{*, device::*};

use linux_embedded_hal::{I2cdev, Delay};
use i2cdev::linux::LinuxI2CError;
use mpu6050::device::{ACCEL_HPF, CLKSEL};

fn main() -> Result<(), Mpu6050Error<LinuxI2CError>> {
    let i2c = I2cdev::new("/dev/i2c-3")
        .map_err(Mpu6050Error::I2c)?;

    let mut delay = Delay;
    let mut mpu = Mpu6050::new(i2c);

    mpu.init(&mut delay)?;

    // Test power management
    println!("Test power management");

    // Test gyro config
    println!("Test gyro config");
    assert_eq!(mpu.get_gyro_range()?, GyroRange::D250);
    mpu.set_gyro_range(GyroRange::D500)?;
    assert_eq!(mpu.get_gyro_range()?, GyroRange::D500);

    // Test accel config
    println!("Test accel config");
    assert_eq!(mpu.get_accel_range()?, AccelRange::G2);
    mpu.set_accel_range(AccelRange::G4)?;
    assert_eq!(mpu.get_accel_range()?, AccelRange::G4);

    // accel_hpf: per default RESET/no filter, see ACCEL_CONFIG
    println!("Test accel hpf");
    assert_eq!(mpu.get_accel_hpf()?, ACCEL_HPF::_RESET);
    mpu.set_accel_hpf(ACCEL_HPF::_1P25)?;
    assert_eq!(mpu.get_accel_hpf()?, ACCEL_HPF::_1P25);
    mpu.set_accel_hpf(ACCEL_HPF::_2P5)?;
    assert_eq!(mpu.get_accel_hpf()?, ACCEL_HPF::_2P5);
    mpu.set_accel_hpf(ACCEL_HPF::_5)?;
    assert_eq!(mpu.get_accel_hpf()?, ACCEL_HPF::_5);
    mpu.set_accel_hpf(ACCEL_HPF::_0P63)?;
    assert_eq!(mpu.get_accel_hpf()?, ACCEL_HPF::_0P63);
    mpu.set_accel_hpf(ACCEL_HPF::_HOLD)?;
    assert_eq!(mpu.get_accel_hpf()?, ACCEL_HPF::_HOLD);

    // test sleep. Default no, in wake()
    println!("Test sleep");
    assert_eq!(mpu.get_sleep_enabled()?, false);
    mpu.set_sleep_enabled(true)?;
    assert_eq!(mpu.get_sleep_enabled()?, true);
    mpu.set_sleep_enabled(false)?;
    assert_eq!(mpu.get_sleep_enabled()?, false);

    // test temp enable/disable
    println!("Test temp enable/disable");
    mpu.set_temp_enabled(false)?;
    assert_eq!(mpu.get_temp_enabled()?, false);
    assert_eq!(mpu.get_temp()?, 36.53);
    mpu.set_temp_enabled(true)?;
    assert_eq!(mpu.get_temp_enabled()?, true);
    assert_ne!(mpu.get_temp()?, 36.53);

    // Test clksel: GXAXIS per default, set in wake()
    println!("Test CLKSEL");
    assert_eq!(mpu.get_clock_source()?, CLKSEL::GXAXIS);
    mpu.set_clock_source(CLKSEL::GYAXIS)?;
    assert_eq!(mpu.get_clock_source()?, CLKSEL::GYAXIS);
    mpu.set_clock_source(CLKSEL::GZAXIS)?;
    assert_eq!(mpu.get_clock_source()?, CLKSEL::GZAXIS);
    mpu.set_clock_source(CLKSEL::OSCILL)?;
    assert_eq!(mpu.get_clock_source()?, CLKSEL::OSCILL);
    mpu.set_clock_source(CLKSEL::STOP)?;
    assert_eq!(mpu.get_clock_source()?, CLKSEL::STOP);
    mpu.set_clock_source(CLKSEL::RESERV)?;
    assert_eq!(mpu.get_clock_source()?, CLKSEL::RESERV);
    mpu.set_clock_source(CLKSEL::EXT_19P2)?;
    assert_eq!(mpu.get_clock_source()?, CLKSEL::EXT_19P2);
    mpu.set_clock_source(CLKSEL::EXT_32p7)?;
    assert_eq!(mpu.get_clock_source()?, CLKSEL::EXT_32p7);

    // reset
    println!("Test reset");
    mpu.reset_device(&mut delay)?;
    assert_eq!(mpu.get_accel_hpf()?, ACCEL_HPF::_RESET);
    assert_eq!(mpu.get_accel_range()?, AccelRange::G2);
    assert_eq!(mpu.get_gyro_range()?, GyroRange::D250);
    assert_eq!(mpu.get_sleep_enabled()?, true);
    assert_eq!(mpu.get_temp_enabled()?, true);

    println!("Test successful");
    Ok(())
}
/dev/i2c-3is a i2c controller of rpi.- The MPU-6050's I2C Device address is 0x34. So we use
newfunction to create a instance.Mpu6050::new(i2c) - In the loop, read MPU-6050 Register and check the value in the range of MPU-6050.
Use the command as below to build and run the app.
cargo build --target aarch64-unknown-linux-gnu -- example test
scp -r ./target/aarch64-unknown-linux-gnu/debug/example/test rpi@192.168.6.77:
After login the RPI with SSH, we can execute the app directly.
sudo ./test
Motion Detection
This example will detect motion with MPU-6050.
use mpu6050::{*, device::MOT_DETECT_STATUS};
use linux_embedded_hal::{I2cdev, Delay};
use i2cdev::linux::LinuxI2CError;
use embedded_hal::blocking::delay::DelayMs;

fn main() -> Result<(), Mpu6050Error<LinuxI2CError>> {
    let i2c = I2cdev::new("/dev/i2c-3")
        .map_err(Mpu6050Error::I2c)?;

    let mut delay = Delay;
    let mut mpu = Mpu6050::new(i2c);

    mpu.init(&mut delay)?;
    mpu.setup_motion_detection()?;

    let mut count: u8 = 0;

    loop {
        if mpu.get_motion_detected()? {
            println!("YEAH BUDDY. Motion by axes: {:b}", mpu.read_byte(MOT_DETECT_STATUS::ADDR)?);
            count += 1;
        }

        delay.delay_ms(10u8);

        if count > 5 {
            mpu.reset_device(&mut delay)?;
            break;
        }
    }

    Ok(())
}
/dev/i2c-3is a i2c controller of rpi.- The MPU-6050's I2C Device address is 0x34. So we use
newfunction to create a instance.Mpu6050::new(i2c) setup_motion_detectionfunction will set up motion detectionget_motion_detectedfunction will get detected motion
Use the command as below to build and run the app.
cargo build --target aarch64-unknown-linux-gnu -- example motion_detection
scp -r ./target/aarch64-unknown-linux-gnu/debug/example/motion_detection rpi@192.168.6.77:
After login the RPI with SSH, we can execute the app directly.
sudo ./motion_detection
Buy it Now
Resources
Documents
Codes
3D Drawing
TBD
FAQ
TBD